Creating a user-friendly game menu is a crucial step in the development of any video game. A well-designed menu not only enhances the player’s experience but also helps them navigate through the game easily. With the rise of various gaming platforms and the increasing complexity of games, prototyping game menus efficiently has become more important than ever. This is where Armature comes into play, offering a powerful toolset for designers to create, refine, and implement game menus faster and more effectively.
In this article, we’ll explore the best practices for prototyping game menus using Armature, a versatile wireframing tool built to integrate seamlessly with Adobe Illustrator. We’ll cover the essential elements of menu design, how to use Armature to streamline the process, and tips for optimizing your workflow.
1. Understand the Types of Game Menus
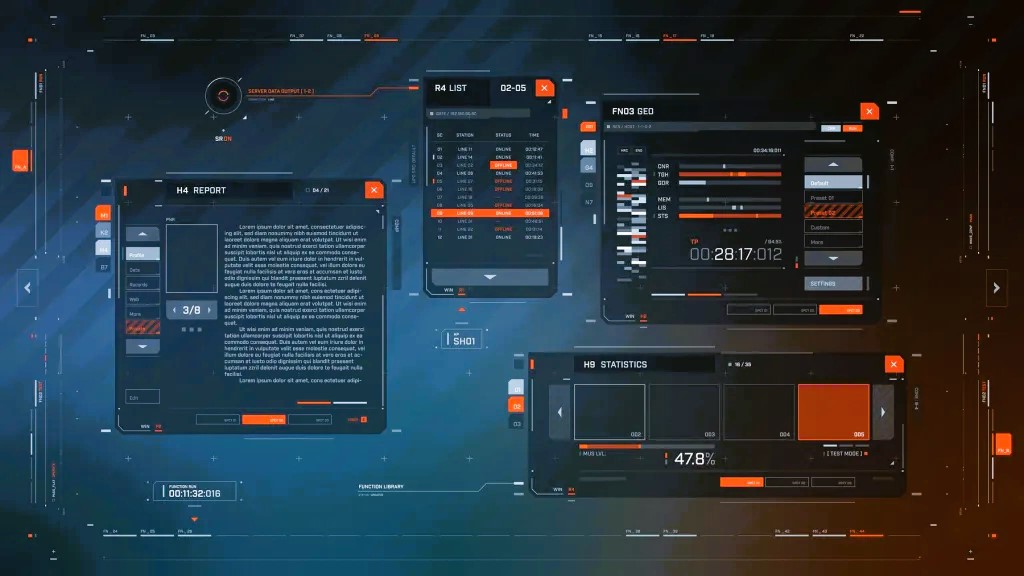
Before diving into prototyping, it’s essential to understand the different types of game menus you’ll be working with. The game menu can range from simple start screens to intricate in-game HUDs (Heads-Up Displays). Here are a few common types:
- Main Menu: The primary interface for starting a game, accessing settings, and loading game progress.
- Pause Menu: A menu that appears while the game is paused, often providing options like resume, restart, and settings.
- Settings Menu: Used to adjust game parameters such as graphics, sound, and control configurations.
- Inventory/Character Menu: Displays items, weapons, or character stats.
- In-Game HUD: A dynamic menu displaying real-time information such as health, ammo, and score.
By identifying the type of menu you’re designing, you can better focus on the necessary elements and structure.
2. Use Armature’s Ready-Made Components
One of the biggest challenges when designing menus is starting from scratch. Armature solves this by providing a library of pre-built components that can significantly speed up the prototyping process. These components are customizable, so you can easily adjust them to match your game’s aesthetic and functional needs.
Some key elements available in Armature’s library include:
- Buttons: Standardized buttons that can be used for interactive options like “Start,” “Settings,” and “Exit.”
- Sliders: Useful for volume control or adjusting graphics settings.
- Checkboxes and Toggles: Essential for enabling or disabling specific features, like sound or graphical options.
- Menus and Dropdowns: Quickly add navigation menus and dropdowns to organize your settings or options.
- Icons and Indicators: Ready-made icons for inventory, health bars, and other game-related elements. Creating cross-platform game interfaces, read our tips and recommendations.
These components are ready to be dragged and dropped into your artboard, allowing you to quickly visualize your menu structure.
3. Focus on Usability and Accessibility
Game menus should be designed with the player in mind. It’s crucial to ensure that your menus are not only visually appealing but also user-friendly and easy to navigate. When prototyping your menu, consider the following best practices:
- Clarity: Make sure each option or button is clearly labeled. Avoid ambiguity, especially for critical game functions.
- Hierarchy: Organize menu items logically. Primary options like “Start Game” should be prominent, while secondary options like “Settings” should be easily accessible but less visually demanding.
- Consistency: Use consistent design patterns throughout your menu system. This includes uniform button sizes, colors, and layouts. Armature’s reusable components help maintain this consistency.
- Readability: Ensure that the text is legible across different screen sizes and resolutions. Choose fonts that are easy to read and consider color contrast for accessibility.
- Feedback: Provide visual feedback when buttons are clicked or hovered over. Armature’s customizable states for buttons and menus can help you prototype these interactions quickly.
4. Design for Multiple Platforms
With the increasing demand for cross-platform play, it’s essential to design menus that work across different devices. Whether your game is on PC, console, or mobile, your menus should adapt seamlessly.
- Responsive Design: Armature allows you to design flexible menus that automatically adjust to different screen sizes. You can test how your menu will look on various devices by resizing your artboard to match common screen resolutions.
- Touch vs. Mouse/Keyboard: When designing for mobile or touch-based platforms, keep in mind the difference between touch gestures and mouse clicks. For example, larger buttons and simple touch gestures are often necessary for mobile interfaces.
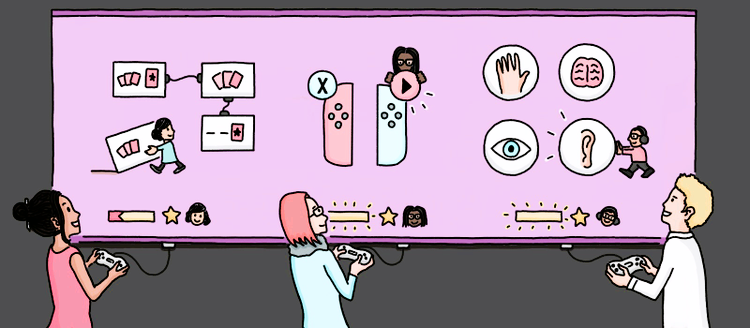
- Console Controller Navigation: For console games, consider the use of a controller to navigate menus. Design your interface with clear button prompts (e.g., “Press X to continue”) and ensure that navigation is intuitive with a controller’s D-pad or joystick.
5. Iterate and Test Early
Prototyping is all about iteration. With Armature, you can create several versions of your game menu quickly and test them to see which design works best. Here are a few tips for testing and iterating on your menu designs:
- User Testing: Once you’ve designed your initial prototype, gather feedback from potential users. Ask them to navigate through the menu and note any confusion or areas for improvement.
- A/B Testing: Create multiple versions of a menu and test which one performs better. For example, you could test different button layouts or color schemes to see which one resonates more with players.
- Test Interactions: Armature allows you to simulate how buttons and dropdowns will function. Make sure interactive elements are intuitive and easy to use by prototyping key interactions early in the design process.
Prototyping game menus can be a complex process, but with Armature’s pre-built components, easy customization, and flexibility, you can create functional and beautiful menus in no time. By focusing on usability, accessibility, and cross-platform compatibility, you’ll ensure that your game’s menu provides an exceptional player experience.
With iterative testing and feedback, you can refine your menu design and optimize it for performance, ensuring it works smoothly on all platforms. Armature’s efficient workflow allows you to focus on what matters most—creating an engaging and intuitive game interface.